Two weeks ago, Spatial hosted a booth at the CONTROL Exhibition in Stuttgart, Germany. I hate to follow John's recent post with another one about a trade show, but this one is worth discussing - let's just call it "Interesting Shows - part 2."
For anybody not familiar with it, CONTROL is a huge show aimed at the dimensional metrology market. Whenever I go to trade shows, I am amazed at the scale of the market (4 huge buildings for this one) and the specificity of the vendors.
The range of devices was quite interesting. There were many varieties of bridge CMMs, but there was also a wide range of hand held measurement machines. One was a small metal ball with mirrors inside. You put the ball on the part you wish to measure, and a nearby camera shoots a laser at the ball, which reflects it back. A similar idea was a wand that looked like the ones used for frisking at airport security. You poke the point to measure, and again a camera measures specific points on the wand which allow it to infer the location of the point you poked. After wandering the halls for a few days, a simple understanding of all of it gelled in my mind.
All that these devices do is measure points in space
 Of course they do that with tremendous variety, which is how they differentiate themselves from each other. Differentiation can be on the accuracy of measurement, point gathering speed, physical access (e.g. you can't put the wing of an airplane in a bridge machine, so you use a hand held device), and much more. But the one thing they have in common is that they're still all trying to do one basic thing - give you three very, very accurate coordinates, many, many times over.
 As a small indicator of just how hard this actually is, I saw a few vendors selling only the granite slabs that go into the CMMs. Imagine - there are entire companies whose only business is to make sure that they give you something very flat on which to put your measurement machine. Now that's accurate.
I realize that to anybody working in this market, this is a simple and obvious concept, but sometimes working on software components, you get so focused on what a specific customer's application is doing that you only see the trees and not the forest -- or maybe the points and not the cloud :-).
Which brings me to the software side of things. The hardware is a major investment and differentiator in the CMM market, but good software is essential to run it. A good CMM program will do things like help the programmer and/or machine operator easily determine which points to measure, it'll tell the machine how to do that in the most optimal way, and it will analyze the gathered points and report the results back to the user.
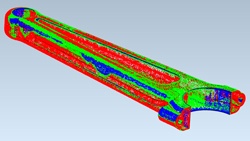
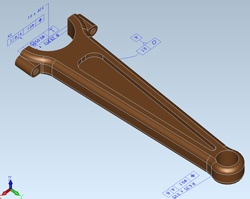
 Obviously, Spatial is very involved in this part of the measurement market, particularly as more and more systems are moving to measuring and comparing to 3D parts rather than 2D drawings. One thing in particular struck me throughout the show - almost every discussion I had turned to the subject of PMI (or GD&T) at some point. There was a time not so long ago when using PMI in CMM applications was a new idea. When we first added PMI to our 3D InterOp product line, we had many customers excited about it, but mostly in principle. Very few were actually doing anything with it. Today the discussion is totally different. We're seeing applications do everything from drive automatic test plan creation to automatic post-process comparison between the gathered points and the tolerances originally specified by the designer.
 Getting out to see the physical products in person is a tremendous help to anybody working in software. For me, I finally internalized both the simplicity and the complexity of dimensional metrology and how we fit into it.
Anybody out there have suggestions for another good educational experience in your market?


.jpeg?width=450&name=AdobeStock_289023609%20(2).jpeg)


.jpg?width=450&name=Application%20Lifecycle%20Management%20(1).jpg)


