

Additive manufacturing, often referred to as 3D printing, is a computer-controlled process for creating 3D objects.
As the name implies, objects are built up by ‘adding’ material — usually a plastic, ceramic, or metal powder — to a build platform in thin layers, which are hardened using a curing agent, heat, or a laser beam.
But how does additive manufacturing work?
After all, the actual build is only one part of a much larger process. In this article, we’ll look at the entire additive manufacturing process from start to finish.
If you’re new to it, it’s easy to assume that the additive manufacturing process falls into just two parts: design and printing. But that’s just not the case.
The additive manufacturing process is really much more complex and can be broken down into four main steps:
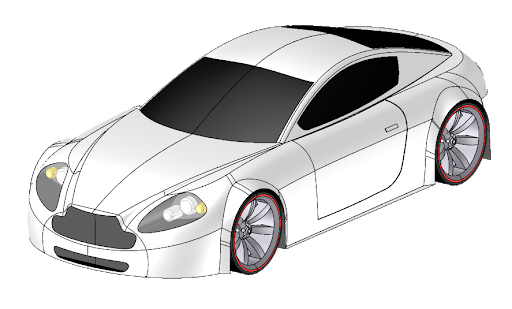
Step 1: Using CAD Software to Design a Model
As you’d expect, Computer-Aided Design (CAD) plays a critical role in additive manufacturing. It’s used to design and test 3D models that are viable for real-world applications.
Some of the top CAD software products for professional use include:
AutoCAD — one of the first CAD suites to be released, all the way back in 1982. AutoCAD is widely used across all industries for 3D design, and known to be extremely versatile in expert hands.
Creo — a market leader in product design that includes a wide range of design functionality and the ability to complete dimension calculations during the modeling process.
SolidWorks — widely used for industrial object design. Solidworks includes an extremely wide range of engineering tools and features.
Step 2: Pre-Processing
Pre-processing covers a range of steps that must be completed between design and manufacturing. It covers two primary activities:
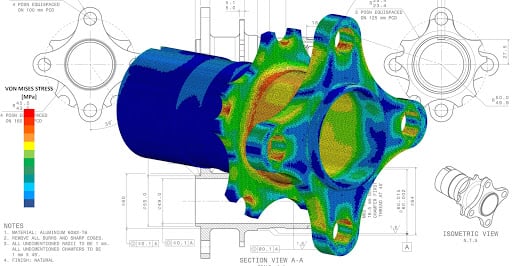
Simulation modeling is used to digitally test 3D designs before they are manufactured. These tests are used to determine the real-world structural integrity of an object — i.e., whether it is likely to fail, how it might fail, and what forces it can withstand without failing.
Common simulation modeling techniques include Computational Fluid Dynamics (CFD), Finite Element Analysis (FEA), and Non-Linear Stress Analysis.
2) Preparing Files for 3D printing
Once a 3D design has been tested and signed off, it’s ready to be prepared for printing. To do this, a hurdle must be overcome: interoperability.
Interoperability is the ability of different computer systems to exchange and make use of information. In the additive manufacturing process, the problem is simple — manufacturing machines like 3D printers don’t ‘understand’ CAD files well enough to enable the manufacturing process.
To overcome this, a file must be converted into a set of instructions that can be understood by additive manufacturing hardware. These instructions are created using ‘slicer’ software such as Spatial’s CGM Polyhedra which converts the 3D design into 2D layers or slices which can then be used to calculate the tool path or G-Code needed to manufacture the object.
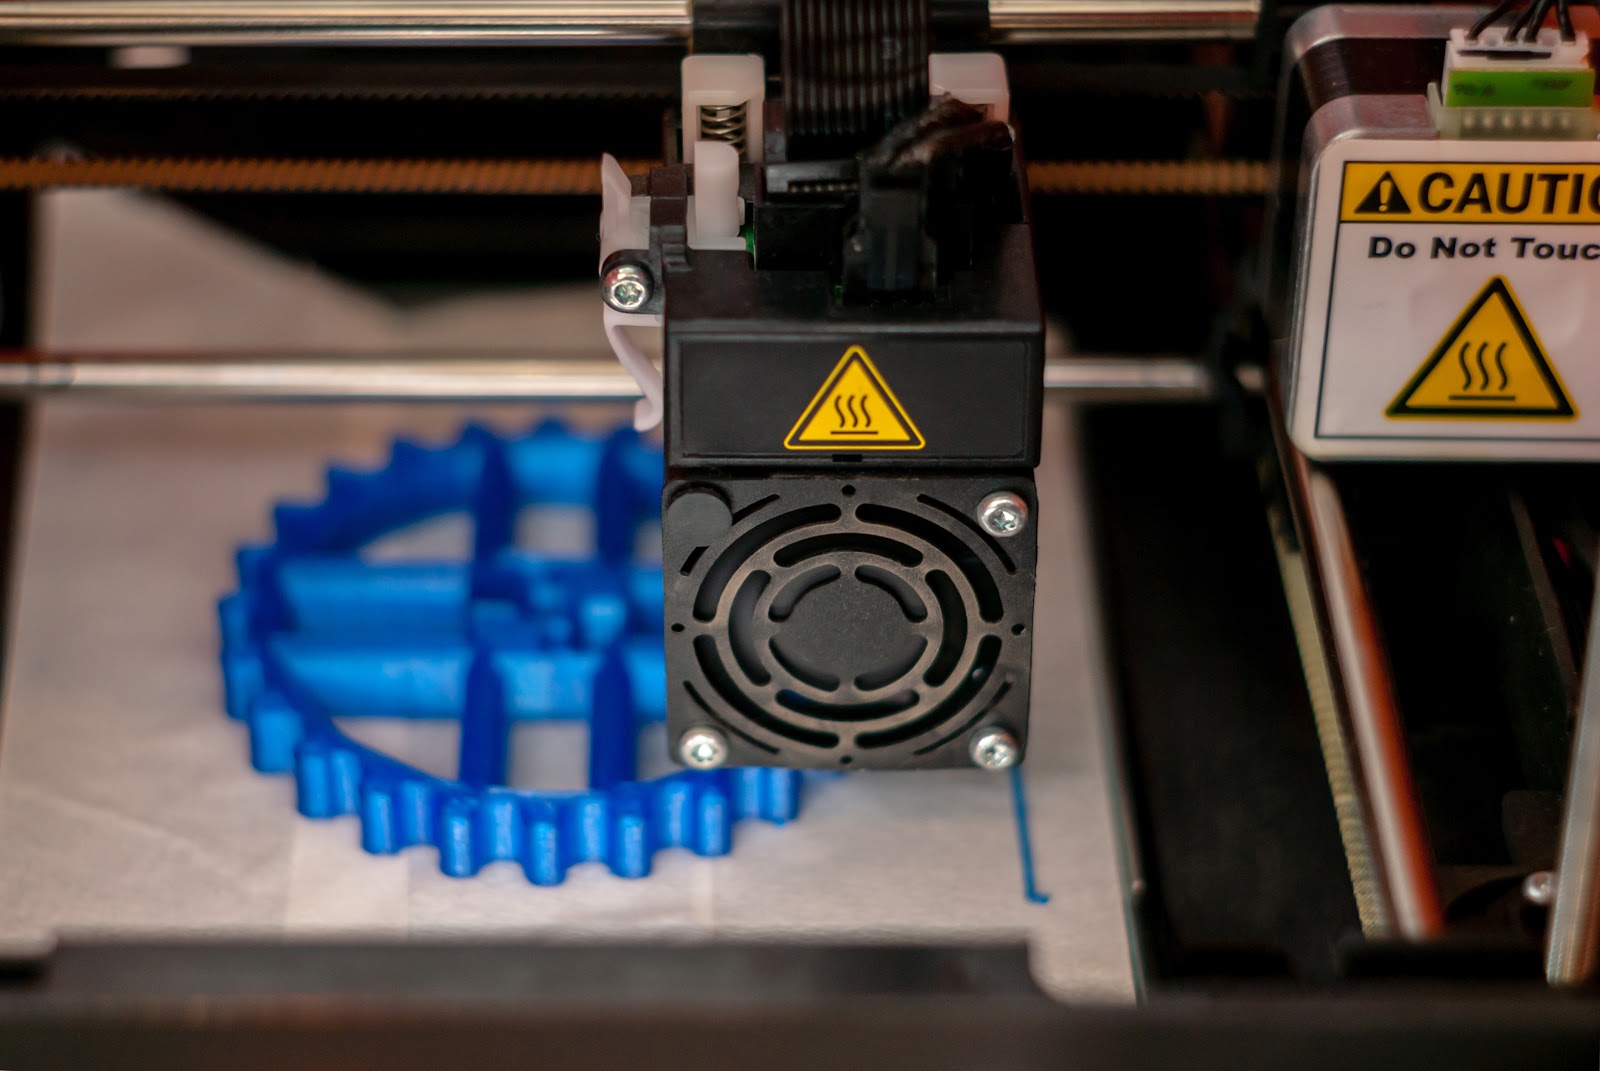
Step 3: Printing
Depending on the additive manufacturing technology being used, the ‘printing’ phase can look very different.
In a typical 3D printing process — like those seen in commercially available 3D printers — print heads alternate a layer of powder material with a layer of binding liquid. These layers are built up on top of each other to form the final product. This process is more accurately called ‘binder jetting’.
However, other forms of additive manufacturing look quite different.
Stereolithography (SLA) uses powerful lasers in place of a liquid binder to cure layers of photopolymer resin. During the build cycle, the building platform is lowered into a pool of resin, into which the laser traces the pattern of the layer being printed. Once each layer is cured, the build platform is fractionally lowered into the resin pool.
On the other hand, in Fused Deposition Modeling (FDM), a thermoplastic material is heated and applied to the build platform layer-by-layer. Once a layer is dry, the next layer is applied on top of it.
Other common techniques include Selective Laser Sintering (SLS), Metal Laser Sintering (DMLS), and Electron Beam Melting (EBM).

Step 4: Post-processing
Post-processing is often the most expensive and time-consuming aspect of additive manufacturing.
The steps vary depending on the type of additive manufacturing process being used, but usually fall into three categories:
- Build removal — Removing excess material from the object and build platform.
- Part separation — Removing the object from the build platform, separating parts, and removing any support structures used to aid the build process.
- Debinding — Soaking objects in a solution to remove any excess binding material.
Every Step is Critical
In manufacturing — and additive manufacturing in particular — cutting corners is never an option. If you want real-world ready components, every stage of the process must be completed with care and due diligence.
If you can develop and maintain a consistent, effective process, you’ll be in a great position to manufacture high-quality components time after time.


