Today, I’m going to discuss how we’ve been using Application Driven Development (AppDD) principles in our work on CGM.
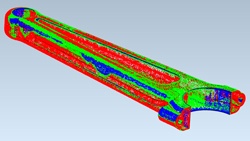
 You might have noticed this really cool picture in Stefanie's last post. It’s really cool because it was the result of our work on the CGM componentization team over the past couple of months – putting dimensional metrology support into our demo application C3D Toolkit. And the other cool part is that we used AppDD to drive the project.
First, some background. A few years back we started getting requests for the ability to work with large sets of points (point clouds) from our dimensional metrology customers. So for the past few years we have been incrementally expanding our support for point clouds in our product line.
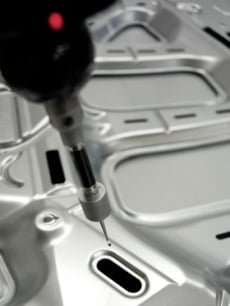
A primary workflow in dimensional metrology is to measure a cloud of points on the surface of a manufactured part and compare those measurements to a CAD model representing the desired geometry.
To do this, the following high-level operations are required:
Operation #1
Operation #2
Operation #3
Over the course of several projects, we had incorporated API functions into ACIS to provide these services. During these projects we worked closely with target customers who were incorporating these functions into their applications, so we were intentionally very focused on the individual functions. The last project of this sequence was to port this point cloud functionality into CGM – I’ll call this version “Phase 1”.
The opportunity to do AppDD came up a couple of months ago when Ray, our PM, told us that he needed a C3D Toolkit demonstration script for the CONTROL show. The idea was to show how CGM’s point cloud functionality could support dimensional metrology workflows.
C3D Toolkit is our recently-introduced JavaScript-based demo application that we’re using to showcase CGM. I’ll talk more about C3D Toolkit in another post; the important thing to know is that the one of its goals is to give us a platform to perform AppDD. The extensions that we write in C3D Toolkit are very high-level; the intent is that the functionality that might appear behind a GUI button in a customer application should correspond to a single C3D Toolkit extension.
 Our first step in the AppDD process was to get a 'storyboard' from Ray of the entire workflow(s) that he wanted to show. This turned out to be a 1 page e-mail describing the steps of the demo.
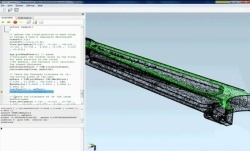
Our next step was to generate proposed demo scripts. One of our team went off and wrote a straw man of what he thought the actual javascript code for the demo should be. Then, in the spirit of teamwork, we all gathered around a pairing station and criticized his straw man :) In particular, we had to decide exactly what the return value was for each call to a JS extension, and what the screen would be showing at each stage. And this is where we saw the true value of AppDD take hold – when we started thinking about highlighting a set of garbage points that we’d selected for removal.
When we originally estimated the project, we thought it would probably take a single two-week iteration, because the hard algorithmic work had already been done in Phase 1. What we hadn’t realized is that we would need a new “part management” layer in the application to manage e.g. the bookkeeping associated with assigning different colors to different parts of the cloud in a point cloud document. Our focus on storyboarding the entire demo first caused us to notice this mistake up front, while we had time to adjust our estimates. It also allowed us to rough out the design up front, rather than generating a lot of code and architecture churn as we incrementally discovered unanticipated workflow requirements.
Only after we understood the demo scripts (which also functioned as acceptance tests) did we actually start coding the functionality behind them. A week before our deadline we were able to demo the bulk of the scripts to Ray, who gave us some course corrections that we incorporated. In the mean time, Ray had also been busy. Since we were trying to mimic a real customer process as closely as possible, we wanted to work with real scan data of a real part manufactured from a real CAD model. So Ray decided on a CAD model to use in the demo, and sent it out (after introducing a distortion for us to detect) to a service provider who manufactured it with a 3D printer and then scanned the resulting part. Stef’s really cool picture is the result of running our demo on this data, with color coding based on whether the measured points are within tolerance of the model.
We’re told that the demo went off very well at the show; people especially liked the ability to hold the actual part in their hands and compare it to the scan results on the screen. An important take away from the project is that the core functionality that we had already written (registration and point-body distance) worked “out of the box” – it was the support infrastructure for managing point clouds in an application document that we spent most of our time on. This validated for us the idea that AppDD helps to ensure a complete interface for customers. Now that we’ve identified (and have working code for) a new layer of functionality that many of our customers will need, we have an opportunity to move it into our point cloud product.

The full demo on this part can be seen in Gregg’s webinar on C3D Toolkit and CGM – it starts at the 30 minute mark and runs about 10 minutes (but you should feel free to watch the whole thing :). One thing to look for: the scan of our part actually did have some garbage points that he removes as a first step. If we hadn’t already thought of the cleanup requirement when designing the demo, we would have discovered it here because we used a real scan (rather than manufacturing test data).


.jpg?width=450&name=Application%20Lifecycle%20Management%20(1).jpg)


